 |
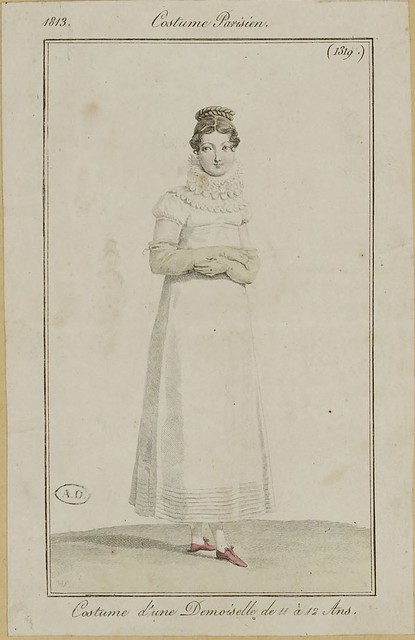
| 1813 fashion plate from Scene in the Past on flickr |
My gown is a bib-front style with a pattern that I cobbled together from a variety of dress diagrams taken from surviving garments. Bib-front construction seemed to be going out of style by the 1810's, but it's very important that I can dress and undress myself for events, so I chose this style of gown for convenience more than anything else. It is made of sheer striped cotton, and the bodice is lined with cotton sateen. The sleeves and skirt are unlined, so my petticoat and chemise work as the lining layers. I discovered that it still has a slightly "merveilleuse-ish" transparency when the sunlight shines behind me, which is a fun feature that makes it a little more daring, I think.
The bib is closed with a pair of dorset buttons that I made myself, and a cord that runs through a channel in the top edge of the bib with loops on both ends. The bottom of the bib is attached to a waistband that wraps around the body and then ties in the front under the bib. The skirt is left open for the top few inches at both of the side-front seams, and I added some thread belt loops at the sides and back to keep the bib ties from slipping down and making these openings gape or wrinkle.
The back is fitted and pretty simple. The side back panels tend to wrinkle a little, which I guess is due to the bias cut, but it doesn't bother me too much. To construct the bodice, I placed the outer fabric and lining together and sewed them as one layer, and then I used a strip of bias tape to finish the neckline. The sleeves have a thin cord running around the bottom edge that ties in a bow on the inside so that I can adjust the tightness. They are based on this pattern, but I ended up enlarging the pattern to 120% and I removed the bottom puff after I tried out a variety of sleeve styles.
Since the dress itself was so simple, I had a lot of fun digging through my stash and making some accessories to liven it up. I started with a 3-sided silk reticule made from these instructions. It was a fun little 2-hour project, and I even made my own silk thread tassels to finish it off. Now that I know how easy these are, I'm determined to make a new reticule to go with every dress that I ever make.
I also painted a pair of cheap cloth flats to match my reticule and added some criss-cross ribbon ties to dress them up a bit. I never could find any ribbons that were the right shade of mauve-y purple, so I dyed some plain cotton tape with a little bit of black Rit, which is a very purple-based color, and they turned out perfect.
And last, but not least, I made a new turban-style cap out of grey velvet with a hint of purple in it. I'll save the details about that project for the next post since I actually remembered to take step-by-step photos for a change. :)
I have a few additional photos on flickr if you are interested, and you can find photos from our 1812 Overture outing there too. We had SO MUCH FUN!
I'll wrap this up with one more entry for the Regency Ladies Wedgie Society. It sort of feels like the wedgie pics are a rite of passage for all of my Regency projects now - it's not truly finished until I take a silly wedgie pic. :)


What a lovely gown, Jen! I, too have a LWD in my Regency wardrobe and it's absolutely a staple! It's just a drawstring-neck round gown with 3/4-length sleeves and I wear it a lot! I love the bib-front style of your dress. It's so elegant! Thanks for sharing-looking forward to the turban tutorial!!!
ReplyDelete~McKenna
cherishingmyrole.blogspot.com
I love it. Plus, with the white-on-white stripes, it's not just a plain LWD. Beautiful, as always!
ReplyDelete(I can't wait for your turban tutorial! ;) )
It's lovely! Perfectly simple and elegant!
ReplyDeleteIt's a beautiful dress, I really like the cut in the back. It's funny, in the 1970's this was a pattern I used rather frequently (short of course). I could do all kinds of different things to it to make the dresses look different. Thanks for sharing, I always like to see your new costumes.
ReplyDeleteVery beautiful dress!!! I love the shoes and reticule too!
ReplyDeletereplica bags on amazon replica bags philippines wholesale replica bags high quality
ReplyDeletereplica bags karachi look here j3t64i7f40 replica bags prada important source a1l97q1v02 bags replica gucci replica bags from korea replica bags online shopping hermes replica k5u77t3p23 7a replica bags wholesale
ReplyDeletee9d45c2v14 y5n79h5l16 m3u85c3u05 m0d95y6v78 w5u25d5c52 e7l34o0e03
ReplyDeleteIt's a beautiful little white dress. Pool Screening Brandon FL
ReplyDelete