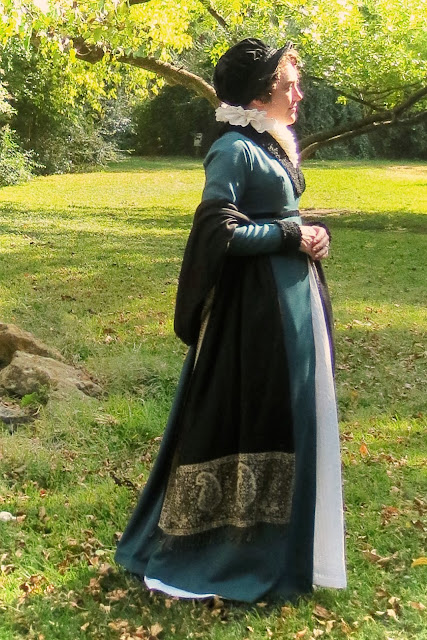
To go with my new pelisse, I needed a new hat, so I turned to a few of my favorite sources of Regency images to help me pick out a style. I can't tell you how many hours I've spent browsing through the incredibly helpful collections put together by Ginger from Scene in the Past, who has a large number of fashion plates webbed on Flickr, and Taylor's Tumblr site Dames a la Mode, which features a wide variety of Georgian fashion plates. Both of these ladies have made it possible to search for images by year, which is invaluable when you are trying to pinpoint the styles and trends for a particular era. So I would like to thank them both and dedicate this project to Ginger and Taylor for the Historical Sew Fortnightly "gratitude" challenge. Taking the time to categorize and share image resources like these takes a ton of dedication and patience, and I am SO thankful to people who make the effort to share this sort of research information with others.
 Although I waffled back and forth between a variety of styles, I finally settled on one of the most popular shapes that seemed to occur between 1805-1810, which I often see referred to as a jockey cap. Costumes Parisiens in 1806 showcased a variety of "toque et capotes de velours" which inspired my own black velvet cap. Although I didn't copy one hat exactly, most of the major design elements that I used can be found in the charming collection of hats depicted on this plate.
I have to confess that this hat was a VERY last minute project, and I whipped it up between 11:00 and 2:00 on the night before the picnic. There are a variety of great regency bonnet tutorials online, but I sort of just "winged it" on my own hat. I started by cutting down the brim of an old wide-brimmed felt hat and steaming into a bit more of a bonnet shape. This allowed me to skip any sort of buckram and wire building, which saved me a ton of time. I covered this felt base with velvet, and because it was such a rush job, that part was mostly attached with hot glue. (shhh - don't tell!) The poofy part on top is just a large oval which I gathered down at the top to create nice folds and covered this bit of stitching with a button. The trim was a lucky find in my stash, and I did take the time to hand-sew that part to cover all the raw edges and ugly bits. I'm sorry I didn't think to take construction pics, but I was so tired at that point that all I could focus on was finishing it and going to bed.
So here are two more views of my quickie capote. It's a pretty simple little hat, but it covered my short hair nicely, was easy to make, and it felt very appropriate for an 1807 gown, so I'm calling it a success!


