The tale of this costume follows a long and meandering path, and to tell its story, I need to go back to the beginning, over a year ago: “Once upon a time, a lowly seamstress heard news of a magical ball in a far off land…”
*ahem* Okay, so maybe that’s a bit too dramatic for a blog post. Let me try that again:
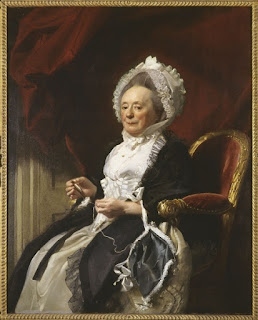 |
| John Singleton Copley, Portrait of a Lady, 1780 |
In the summer of 2014, the organizers of Costume College announced that their next theme would be “Plucked from the Pages: Costuming Your Favorite Literary Characters”. I usually have a HORRIBLE time deciding what costumes to make for big events like this one, but I knew almost instantly want I wanted to make for the 2015 Costume College Gala. Out of all the old fairy tales, Little Red Riding Hood is my favorite, so I decided that I would be the Wolf wearing Grandma’s clothing. But I had no intention of being a sweet old grandma wrapped up in blankets with curlers in her hair. I wanted to be an elegant 18
th c.
grande dame like you see in so many paintings from that age. There is so much subtext and darkness and deeper meaning in old fairy tales, so I started wondering if the real Grandma was meant to be somewhat terrifying and wolf-like on her own, and maybe that’s why Little Red couldn’t tell the two apart. Who knows if that was the original intention, but it’s a fun thought, and one that you could easily imagine being true when you see the countless historical images of stern-looking matriarchs with silver hair and piercing eyes.

I started by collecting pictures of older women in Georgian
paintings (check out my
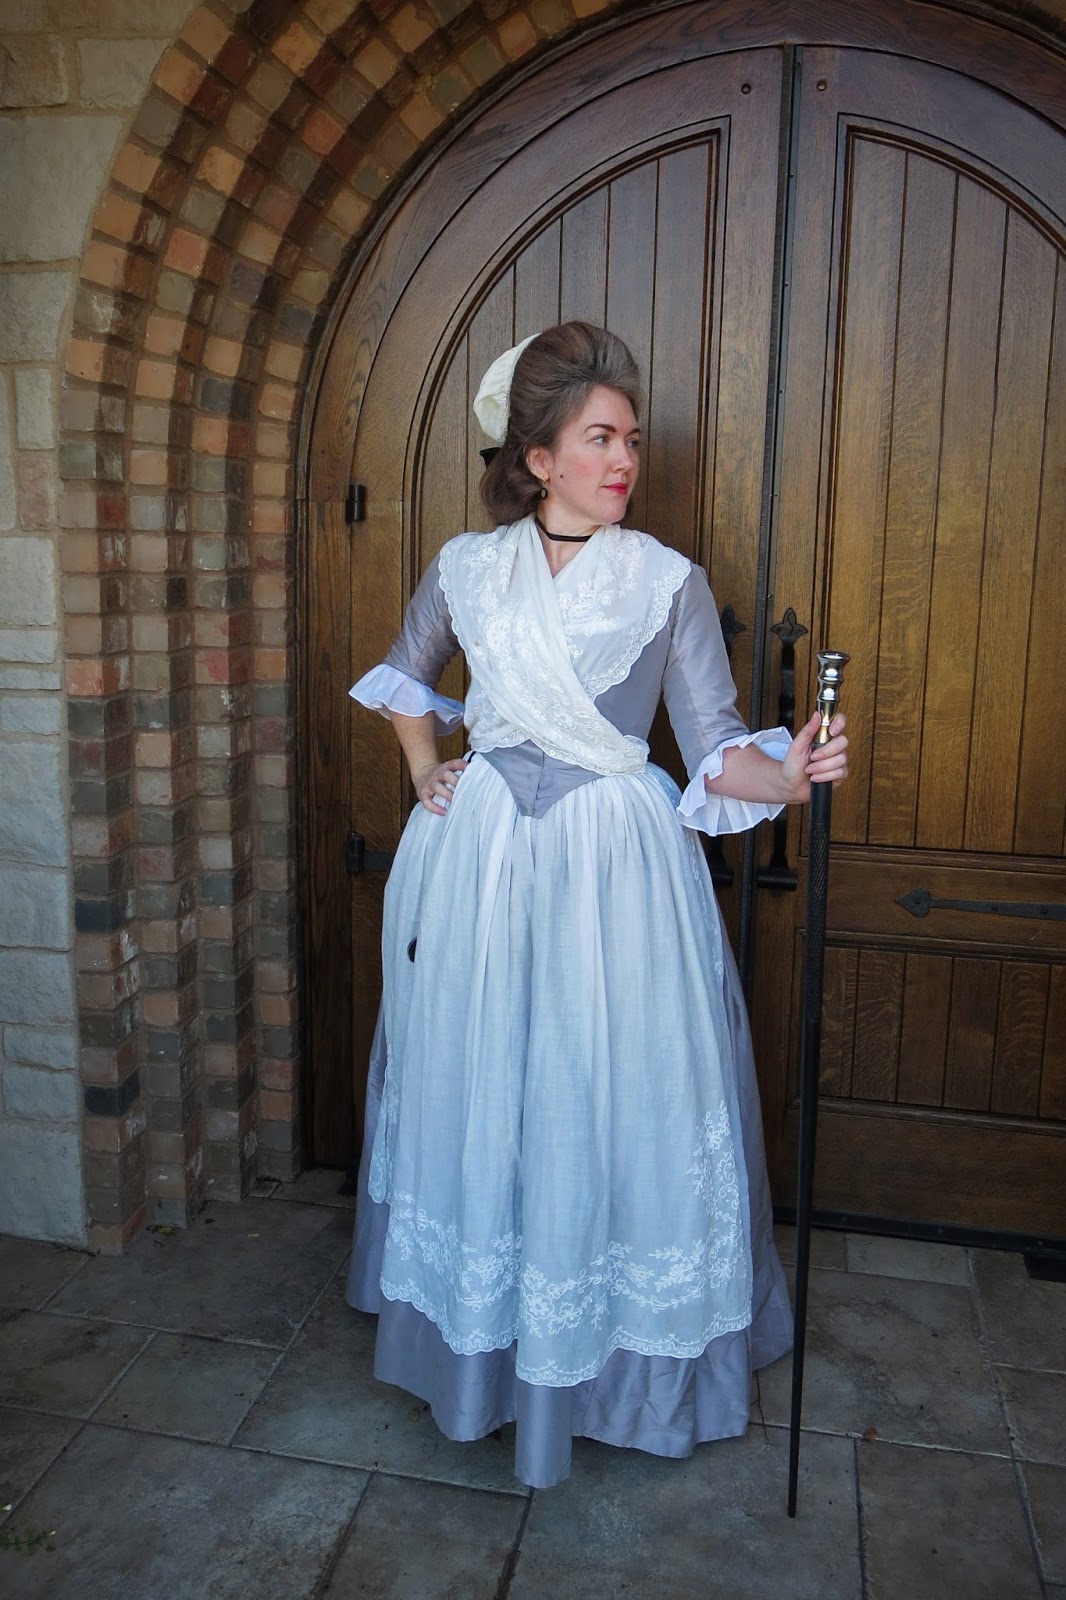
Pinterest board for lots of great Grannies). Many of these ladies are shown in grey or taupe gowns with an abundance of frilly white caps, aprons, and fichus, and this color combo already looked very wolf-like to my eyes. For my costume, I decided to make a simple grey silk taffeta round gown, and I drafted my own pattern by modifying and combining several of the dresses in
Patterns of Fashion
. Although my dress is quite plain on its own, I was lucky enough to find some gorgeous tambour embroidered curtain panels from the 1930’s at an antique show a few years ago, and they worked perfectly for my apron and fichu. The panels all had some staining and damage in various places, but I was able to cut around the bad spots, and I’m thrilled with the way they turned out. To finish off my gown, I made a pair of organdy sleeve ruffles that I just pinned in place.

Although my dress was fairly simple, I decided that I wanted my hair to be more dramatic for the gala, so I made a large 18
th c. wig based on the instructions in Kendra’s Van Cleave’s wonderful book -
18th Century Hair and Wig Styling
. I used the instructions for the Lilac wig to build the wire base, and I used a
Lioness wig
plus several hanks of loose hair to cover the base and make the buckles. The wig was originally dark brown, but I sprayed it with
Jerome Russell B Wild Color Spray in Siberian white to make it grey, and this was definitely the best white hair spray that I’ve tried yet. I’ve never worn a wig this big before, but it was lots of fun and surprisingly comfortable. The only unexpected side effect is that it gave me a bit of a face lift from the weight of it pulling backward on my head, which made me look a less matronly than usual. The funny thing is that even though this wig seemed MASSIVE when I was building it, it didn’t seem big at all once I had the whole outfit on. While I was wearing it, I kept thinking, “eh – I could have gone a lot bigger”, and if period painting can be believed, this ‘do was still quite modest compared to many.
More than anything, 18
th century grandmas seemed to love their ridiculous caps, but I wasn’t sure how huge and silly I really wanted to go with mine. What I ended up with was relatively tame compared to what you often see in period paintings and fashion plates, but that’s mainly because I put the cap off for the last minute and didn’t have time to keep hemming ruffles. My cap is made from organdy, and it is just a much larger version of a typical 18
th c. cap. It is made from a large oval in back with a band that is wider at the sides and narrower at top, and I covered the band with several rows of box pleated ruffles and some poofed black ribbon. It also has a hanging tail of fabric in the back, which is a common look, even if it doesn’t seem to serve much purpose.
While I was sewing my gown, I was also working on a wolf mask, which was quite an adventure as well. I discovered the work of Joni Good and her book,
How to Make Masks!
. Joni makes some of the most amazing papier mache masks that I’ve ever seen, and you can find much more of her work on her website,
Ultimate Papier Mache. I used her techniques and sculpted a mold for my mask using terra cotta clay, then I covered it with shop towels and the plaster/glue mixture that she describes in her book and instructional videos. I actually ended up making two wolf sculptures and papier mache shells because I forgot to use a release agent on the first one, so the paper mache stuck to the clay and wouldn’t come off. Whoops! But it all turned out for the best because I liked my second version of the wolf much better.
 |
| photo by jennylafleur |
While I loved making the wolf mask, I have to admit that I didn’t love wearing it. Very few people knew who I was when I arrived at the gala, and it was almost impossible to hear me when I talked because it was so noisy and the mask muffled my words. I also had a limited range of sight, so I had to be very careful not to step on trains or bump into tables. So it was fun for the grand reveal and a few pictures, but poor Wolfie didn’t last long at the party. But the best part about wearing this costume was that my friend Ginger decided to make an 18
th c. Little Red costume to go along with my Grandma Wolf, and she made the most AMAZINGLY gorgeous
polonaise à coqueluchon, which is a hooded gown that was popular at the time. Recreating the characters of this story in a more historical way was SO incredibly fun, and I was thrilled every time somebody had an “ah-ha!” moment and realized who we were. I’m so happy and grateful that Ginger decided to play along with me, and doing this theme with her was one of the highlights of my trip.
So that’s the story of Grandma and the Wolf, but this tale had one more twist that surprised even me in the end. Although I wasn’t planning on wearing this outfit again so soon, we had an unexpected cold front move in right before our yearly Georgian Picnic, and I decided that a silk round gown would be a little warmer than my semi-sheer cotton chemise dress that I had originally planned on wearing. I still desperately needed a cloak to block the wind, but when I dug though my stash, the only thing suitable that I found was some coat-weight red wool that I found at an estate sale many years ago. So I used the hooded cloak and mantle patterns in
Costume Close-Up
as a guide, and I quickly threw together a little red mantle to keep me warm at our picnic. So without even planning it, this costume now has become Grandma, the Wolf, and Little Red Riding Hood all in one!
 |
Maurice Quentin de La Tour,
portrait de Nicole Ricard, enfant, 1748-1750
|
I trimmed my mantle with strips of pinked, box pleated wool in a style that is very similar to this charming painting of a young girl. I think most winter cloaks were probably lined in the period, but I didn’t bother to do that on mine since the fabric was felted and quite heavy already. My only complaint is that the hood pattern that I used probably dated from the mid-1700s, so it ended up being a bit small for my later 18
th c. hairstyle. I’m tempted to take the hood off and try adding a larger one in the future, but I still love my little red riding hood like crazy, and it kept me quite warm and cozy at the event.
I also wanted to take a minute to thank several of my friends for giving me some of the gorgeous accessories that you can see in these pictures. My mitts, workbag, pinball, and muff were all gifts made by amazingly talented and generous ladies, and I can't tell you how much that I treasure them! So thank-you Kendra, Angela, Stephanie, and Mary - you are all so dear to me!
And as a final epilogue to this story (which I'm afraid has gotten quite long winded!), I also wanted to mention my new market cap and hair experiments. I had no interest in wearing my large wig to a windy outdoor picnic, so I decided that a more simple style of hair with a market hat would be much more appropriate. I bought a market cap pattern from Maggie at
Undressed Lady last summer, and I made it up in a few hours last week from some scraps of black taffeta left over from older projects.
I’ve also been dying to try out the pomade and powder that I bought earlier in the year from Abby at
Heirloom Haircare, but I had a huge disaster on the morning of the picnic and discovered that I had misplaced my pomade. So after a failed search and a lot of panic and cursing, I finally resorted to wearing my bushy white wig out of desperation. It’s not the right style of hair for my outfit, and it badly needs restyling, but it was better than nothing, so I sucked it up and just made do with my sad backup wig. Unfortunately, the market hat really needs a tall hairstyle to support it, so I was pretty disappointed with the way it looked at this first wearing (my picnic pictures are
here if you are curious).
But then as I was cleaning my sewing room two days later, I found my pomade and decided to give it another try. OMG – I am in love! My hair is mid-back length right now and not overly thick, so I wasn’t sure if I would be able to pull off an 18
th c. hairstyle without adding in extra pieces. But the pomade and powder thickens up your hair so beautifully, and I was amazed by how well it stayed in place with no need for teasing or hairspray. I started by pinning a rat of loose synthetic hair that was wrapped up in a hair net on the top of my head, then I combed my own hair over the rat and pinned it down in back. Then I made two large buckles and a loop with my remaining hair that was hanging down (I basically just copied Abby’s look shown on
her blog). After it was all in place, I re-powdered it to make it more obviously grey, and I hid the parts in back where it was pinned with a cap and a bow. I don’t think I’ve ever had such good luck styling my own hair before, and I’m absolutely amazed that I managed to pull this look off on my first try! And as an added bonus, my market hat suddenly went from “wah, wah, waaaa…” to “WOW!” once I had the right hairstyle to support it.
Since I had such good luck with my practice hairstyle, I decided to get dressed up one more time and finally take some proper pictures of my dress. I didn’t get many that I was happy with at either Costume College or the picnic due to bad lighting and my failed hair, so it was fun to finally come up with some shots that I’m really happy with. Check out my
flickr if you want to see more.
"... and they lived happily ever after. The end!"


 To personalize my costume I decided to pull some inspiration from other 1890's fashion patterns and cycling imagery and convert my bodice into a jacket. I used the pattern diagram for a "ladies' street costume" in Kristina Harris's 59 Authentic Turn-of-the-Century Fashion Patterns to create the jacket peplum, and these patterns also to helped me figure out how to add a wide collar and lapels to my existing bodice. There are a lot of great historical patterns in Harris's book (and its companion, Authentic Victorian Fashion Patterns), and in my opinion, it's a million times easier to modify a good foundation pattern like the Wearing History one than to draft something from scratch.


 And because I'm officially Extra™, I also pulled out my bicycle and took it for a spin to see how this outfit feels on a bike. The bloomers are really comfy while riding, although you still have to dismount carefully so they don't get caught on the seat. My only issue was with my shoes, which tended to slip on the plastic pedals if I wasn't careful thanks to their smooth leather soles, but that issue could probably be solved pretty easily by adding some rubber grips. I've had several people ask me if I would be wearing this outfit for any tweed rides, and I would absolutely love to do that if they host any more themed cycling gatherings in my area. It was crazy fun to ride my bike in this kooky outfit, and the only thing that would be better is if I could buy an actual antique bicycle to add to the authenticity.


